I recently got a SnapMaker 2.0 A350T and I love it. I always forget how to set up the machine for CNC machining and laser cutting, so here goes…
CNC machines have two different coordinate systems, which have the same orientation, but different origins:
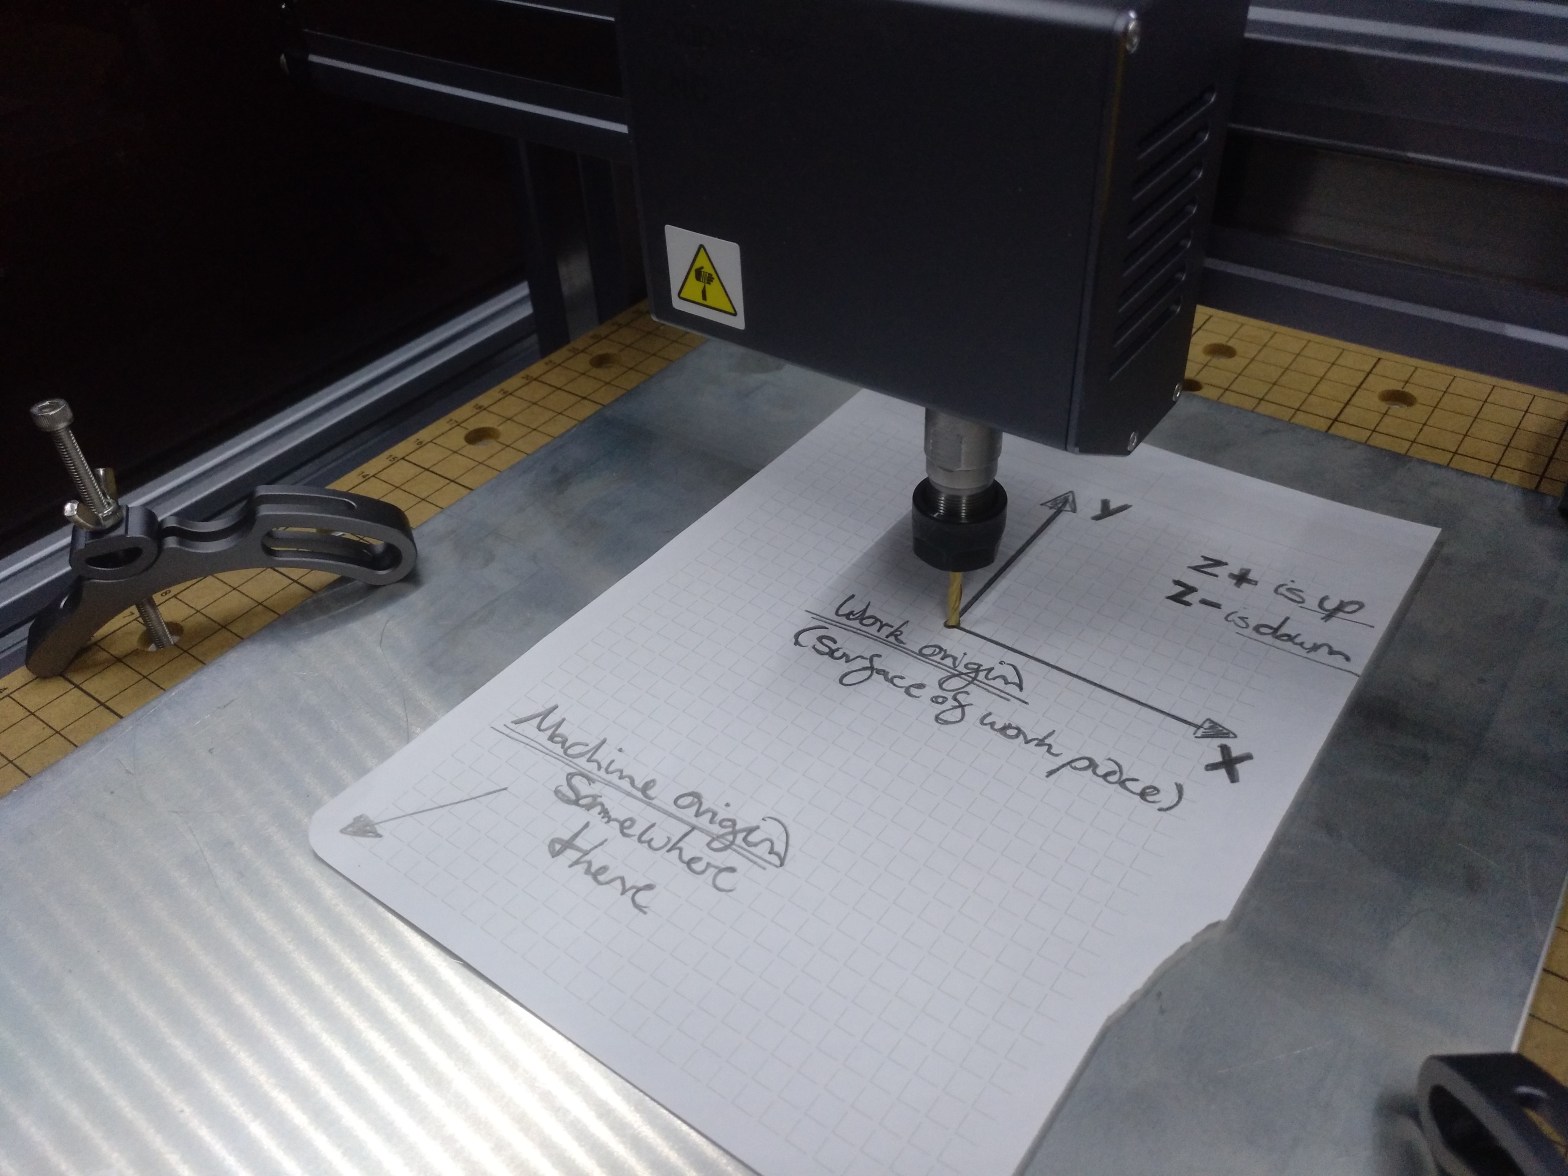
- Machine coordinates: These are the physical / machine coordinates of the tool head on the machine. When homing the machine you set a home position close to the end switches of the machine, e.g. X:-19 / Y:347 / Z:334 mm in my case. The origin of that coordinate system is then at 0 / 0 / 0, somewhere in space. This sounds weird, but should not matter to you much. The important coordinate system is:
- Work coordinates: These are the coordinates of the tool head on the work piece you want to process. The work origin should be somewhere on the top surface of the work piece. It makes sense to choose the center of the work piece, because the tool head will start a job at that position and will move to the start of the geometry from there.
An image can say a thousand words:

Setting up a CNC or laser cutting job:
- Fasten your work piece on the machine. Make sure the tool head / tool can’t hit the clamps etc. Make sure the clamps are not protruding the machine table or they might hit the rails.
- Mark the center of the work piece.
- In the software choose the physical dimensions of your work piece.
- Select “center” as the work origin.
- Position your geometry, create tool paths, yada yada, export to workspace.
- Move the tool head / tool to the center position of the work piece. Put a piece of paper between the tool and the work piece and lower the tool until you can move the paper, but feel a bit of resistance. Set the work origin to that position (“Set Work Origin”).
- Move the tool head up, so it can’t hit anything when moving and try to trace the bounding box of your geometry (“Run Boundary”).
- If that looks safe, “Go To Work Origin”, move Z+ (up) one mm and “Run Boundary” again.
- If that looks safe start the job (“Start On Luban”).
